Dockerize your REST API
If you are in IT field, you must have come across the term Docker. Docker is still very new and gained traction in the last year or so. So, what is Docker? Docker is a open-source platform that allows you to run your application image in a virtual environment. There are two parts to Docker - image and container. An image is a file that contains a stripped down version of Linux OS along with your application and all its dependencies. While container is a running instance of an image. The Docker Engine provides the technology to create the image for your software and also to run and manage the container. You can find more about Docker here.

For example, REST Hello World application from my earlier posting can be turned into an Docker image along with all its dependencies and the Tomcat web container in which it’s going to be deployed. In other words, rest-helloworld.war and the Tomcat server can be turned into a Docker image. Here, I will explain how to turn the example REST Hello World into a Docker image. Before we go any further, I highly recommend you to get familiarize with Docker by going over Getting Started with Docker for Windows.
Install and Run Docker Toolbox
If you haven’t already done so, install the Docker Toolbox software from here. Instructions for installing the software can be found here. Once you have installed the Docker Toolbox, launch a Docker Toolbox terminal by clicking the Docker Quickstart Terminal icon  on your desktop.

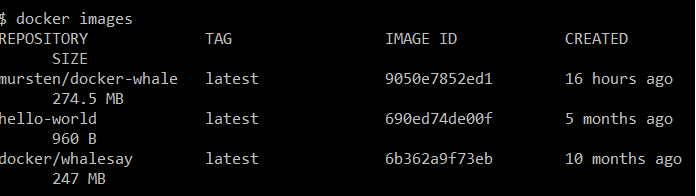
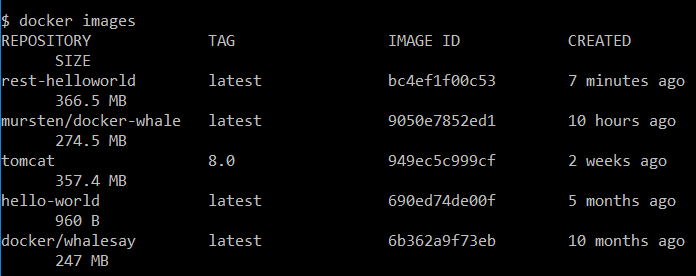
Once the terminal displays the prompt, type docker images and press Enter. It should display all the images
installed in your local system.
$ docker images
 </span> </pre>
Download Tomcat Docker Image
In order to create our image, you need a Tomcat Docker image in your local system. Download the Tomcat image from the Docker Hub by typing the pull command then press Enter.
$ docker pull tomcat:8.0
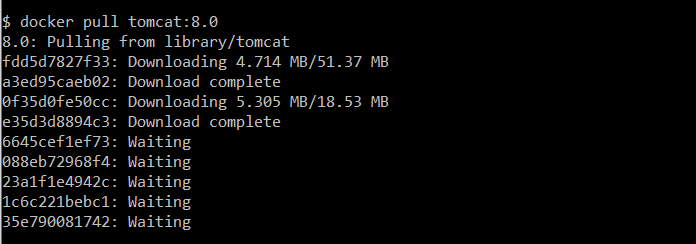
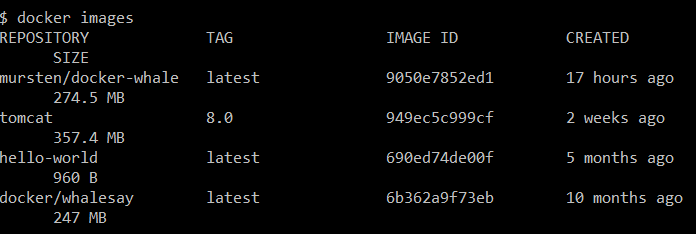
The docker pull command downloads the Tomcat 8.0 pre-built image from the Docker Hub to your computer. Check if the image is in your local system, by typing docker images and then press Enter.
$ docker images
Configure and Run Tomcat
You can run the Tomcat image by typing the docker run command and then press Enter.
$ docker run -it --rm -p 8080:8080 tomcat:8.0

To test if Tomcat is up and running, open a new Docker Toolbox terminal by clicking the Docker Quickstart Terminal icon. Once the terminal is running, execute the curl command:
$ curl localhost:8080
It should retrieve the Tomcat homepage in HTML format and show it in the terminal. You can test in the browser by going to http://localhost:8080. If it cannot access Tomcat homepage from the browser, it means the port forwarding rule is missing in your Virtual Box settings.
Configure the port forwarding by clicking Oracle VM VirtualBox icon  on your desktop. Follow rest of the steps to set up the new port forwarding rule:
-
Once the Oracle VM VirtualBox Manager is up, click Setting from the menu.
-
Select Network on the left pane on the Settings dialog.
-
Click Port Forwarding button on the right Network pane.
-
On the Port Forwarding Rules dialog, click Add new port forwarding rule button.
-
Name the rule as
docker-8080; inputTCPas the Protocol;127.0.0.1as the Host IP;8080as the Host Port; and8080as the Guest Port. Click OK to save the rule. -
Click OK to get out of the Settings dialog.

Now try to access http://localhost:8080 from your browser. You should notice the Tomcat homepage.

You can stop Tomcat by hitting Ctrl + C in your terminal.
Create a Dockerfile
A Dockerfile describes all the software elements (including all the software ingredients along with run instruction) that make up a Docker image. In the Docker Toolbox terminal, navigate to rest-helloworld project. Let’s say the example project is located in the folder C:/rest-helloworld, you can change the directory by typing cd /c/rest-helloworld and press Enter:
$ cd /c/rest-helloworld
Make sure that you are in the correct location, by executing the pwd command in the terminal and then press Enter.
$ pwd
This should display the full path of the current working directory. Create a Dockerfile by typing touch Dockerfile and then press Enter.
$ touch Dockerfile
Edit the newly created Dockerfile by typing notepad Dockerfile& in the terminal and then press Enter. This should bring up the Notepad.
$ notepad Dockerfile&
Type the following lines in the Notepad and save the Dockerfile by selecting File > Save on the Notepad menu.
FROM tomcat:8.0
MAINTAINER Indra Basak
COPY ./target/rest-helloworld.war /usr/local/tomcat/webapps/
CMD ["catalina.sh", "run"]
Here is the explanation of all the instructions in the Dockerfile.
-
FROMinstruction sets the base image. The syntax is -FROM :. In our case,tomcatis the name of the image and the tag is8.0.Tagis optional. -
COPYinstruction copies a local a file into the container. In our case, it copies therest-helloworld.warfile from thetargetfolder under the current working directoryC:/rest-helloworldto Tomcat’swebappsdirectory. -
CMDinstruction tells Docker on how to run the software image. In our example, it’s instructing to execute thecatalina.shscript and passing run as an input parameter. You can find out more about Docker instructions here.
Build Image
Build your software image by typing the build command in the Docker terminal and then press Enter. It may take a few minutes to finish the operation.
$ docker build -t rest-helloworld .

The Docker build command picks up the Dockerfile from the current working directory (make sure not to miss . at the end of the command) and creates a new image named rest-helloworld from the instructions specified in the Dockerfile. You can find more about Docker build here. Execute the docker images command to make sure you have the new rest-helloworld image.
Run Image
Run your newly created image by executing the run command in the terminal:
$ docker run --rm -it -p 8080:8080 rest-helloworld
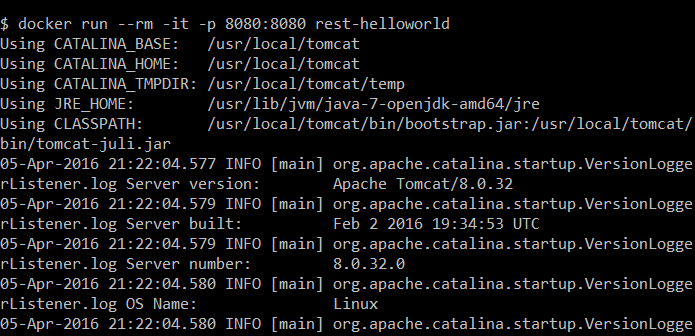
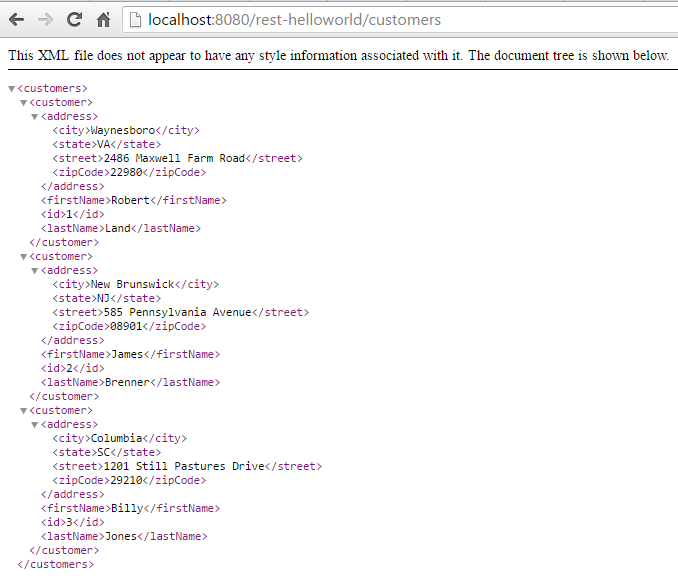
Once the application starts up, you can access the application by typing the http://localhost:8080/rest-helloworld/customers in your browser. You should see a list of customers.
Now that you know what Docker is, go and dockerize your own applications. It will save you from lot of headache that comes with provisioning new environments (servers) for your applications.